Previous PageTable Of ContentsIndexNext Page

These playing accessories will allow us to learn about three kinds of chamfers (bevels).
We will start from very simple objects. The die is a cube, as is the playing card (but with different proportions). The token is a circle that has been extruded to produce a cylinder.

      q Tool: 3D Primitives/Cube
      q Do this:
      We will start from very simple objects:

        · The die is a cube.
        · The playing card is also a cube, but its proportions have been changed with the Scale tool.
        · The token is a cylinder.

      q See the detailed explanations in the chapter:
      User Manual/Tools/Construction/3D Primitives/ Cube,
      User Manual/Tools/Construction/3D Primitives/ Cylinder,
      User Manual/Tools/Assembly/Scale

      q Tool: Chamfer
      q Open the model file: Carte1
      q Do this:
      1. Make the card the current object. Then select the Chamfer tool. Select the icon.
      2. With the Lasso, successively surround the four corners of the card.
      3. With the “+” and “–” keys, set the desired chamfer radius.
      4. Validate and put the tool aside.
      q See the detailed explanations in the chapter:
      User Manual/Tools/Modeling/Chamfer

      q Tool: Chamfer
      q Open the model file: Carte1
      q Do this:
      1. Make the cube the current object. Select the Chamfer tool. Select the icon.
      2. With the Bullseye, click on each corner of the cube.
      3. With the “+” and “–” keys, set the desired chamfer radius.
      4. Validate and put the tool aside.
      q See the detailed explanations in the chapter:
      User Manual/Tools/Modeling/Chamfer


      q Tool: Chamfer
      q Open the model file: Carte1
      q Do this:
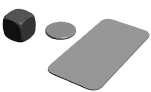
      1. Make the token the current object. Set the side view (key 4) to see the edge of the token. Set orthographic viewing (using the Control Panel) to see the token as shown in the picture; this will make the next step easier.
      2. Select the Chamfer tool.
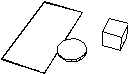
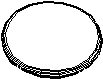
      3. With the Lasso, first surround the upper face of the token and validate. Then, surround the lower face of the token and validate.
      4. With the “+” and “–” keys, set the desired chamfer radius.
      5. Validate and put the tool aside.
      6. Set perspective viewing (using the Control Panel).
      q See the detailed explanations in the chapter:
      User Manual/Tools palettes/Modeling/Chamfer,
      User Manual/Modeling help tools/Control Panel /Perspective

Previous PageTable Of ContentsIndexNext Page